Difference between revisions of "Importing video traffic into OPNET"
From NMSL
| Line 1: | Line 1: | ||
| − | ==Video Traces== | + | == Video Traces == |
Video Trace files available at | Video Trace files available at | ||
| Line 6: | Line 6: | ||
| − | ==Processing Video Traces== | + | == Processing Video Traces == |
The video traces data required pre-processing before they could be imported into OPNET Modeler video conferencing application (VCA) traffic data. The frame sizes need to be extracted from the video traces, then converted from bits to bytes. Saving the final result as a .csv compatible format file. | The video traces data required pre-processing before they could be imported into OPNET Modeler video conferencing application (VCA) traffic data. The frame sizes need to be extracted from the video traces, then converted from bits to bytes. Saving the final result as a .csv compatible format file. | ||
| Line 19: | Line 19: | ||
Save the output file into your opnet_models folder. Or any folder in your OPNET models path. | Save the output file into your opnet_models folder. Or any folder in your OPNET models path. | ||
| − | ==OPNET Setup== | + | == OPNET Setup == |
* From the Object Palette insert an "Application Config" node | * From the Object Palette insert an "Application Config" node | ||
Revision as of 13:28, 2 April 2009
Video Traces
Video Trace files available at
Processing Video Traces
The video traces data required pre-processing before they could be imported into OPNET Modeler video conferencing application (VCA) traffic data. The frame sizes need to be extracted from the video traces, then converted from bits to bytes. Saving the final result as a .csv compatible format file.
For Verbose Trace File use this shell command line to do the extraction:
- awk '// {print $4/8}' video_trace.data > traffic_trace.csv
For Terse Trace File use this:
- awk '// {print $2/8}' terse_trace.data > traffic_trace.csv
Save the output file into your opnet_models folder. Or any folder in your OPNET models path.
OPNET Setup
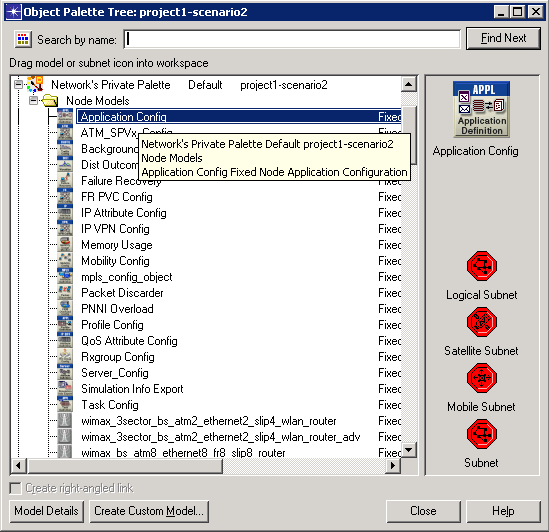
- From the Object Palette insert an "Application Config" node
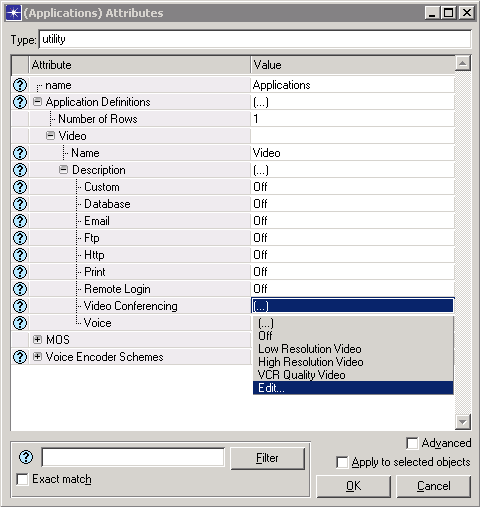
- Next, edit the attributes of the Application node. Under Application Definitions->Description select "Video Conferencing". Choose "Edit"
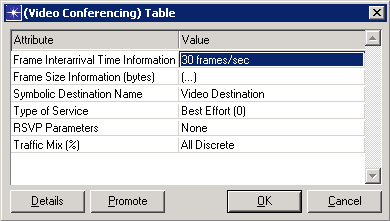
- Enter the video's frame rate into "Frame Interarrival Time Information" field.
- Select "Edit" for Frame Size Information (bytes)
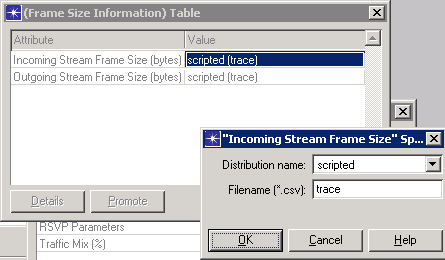
Select "Edit" for Incoming and Outgoing stream. Set Distribution Name=scripted for both incoming and outgoing stream. Enter the processed traffic_trace (without .csv extension).

- On the client/workstation select the profile with the Application you've just created.
- Run the simulation :)


